.png?height=120&name=KonaAI-Reversed%20(1).png)
Data Import
This is the sub-section of the portfolio Data Management where the actual data sanitization occurs. For the data cleaning to occur, the data must first be imported into the konaAI application database.
Before you begin to work on your data, ensure that you have all the required information added to your project.
This section of the guide will help you understand how to conduct
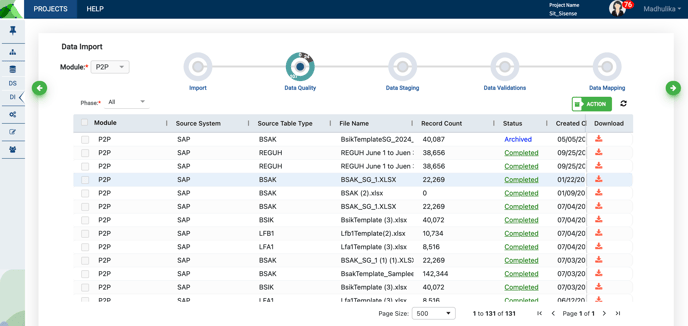
Data Import Process
- Click on the Data Import option, under Data Management in the left menu.
- A gird is displayed on your work area with column names: Module, Source ERP System, Source Table Type (refers to the template name), File Name and Status.
- These check boxes could be used to either import a single file or multiple files at the same time. The files must be in Not Initiated status to import them.
- After selecting the files, click on the “Import” button
-
- A pop-up will appear on your screen to confirm your selection, click Yes to continue.
- The data import ribbon on top of your work area shows you the other processes that you can perform under this section.

Microsoft Fabric
When Microsoft Fabric is enabled, this screen displays the name next to the heading “Data Import”. Select the “Data Ingestion” option under the green “Action” icon to import data from Azure Data Lake.
For any given source system, there are several templates built into the application, you may download all templates or only those applicable for your project.

When you initiate a template download, you will receive an email confirming the action or intimating you of a request failure.

After successful download, you may begin updating your data sets.
When the toggle “Ingest Data from Last Refresh” is enabled, the data from the previous entries (up to 200) are displayed along with the new updates. When disabled, you may add specific data filters by selecting from the options provided on screen.
The “Preview” button displays the system updates done along with the template that was modified.

Data Quality
Once the data is loaded into an appropriate database table it undergoes some sanitation checks such as date column mismatches and possible data shifts.
The initial status of the file is “Not Initiated”. You may use the checkboxes to select one or multiple files and then click on the “Data Quality” button to perform quality checks. Here again, the files undergo similar status – In Queue, In Progress, Failed, or Completed.
To view the status execution details, you may download a pdf of the Data Quality Check (DQC) conducted. In DQC, your files can be downloaded at both the file level and phase level.
- File Level: Each record in the grid has a download icon, click on the icon to download the corresponding file.
-
- It will provide a list of all your transactions and those that got hit.
- Phase level: Select a phase from the dropdown and click Action > Export to download the files.
-
- For phase-level downloads, a record with a hyperlink is added to the User Download screen.
- Click on the highlighted hyperlink to open a pop-up window with all applicable details. The file can then be downloaded from the User Download screen.
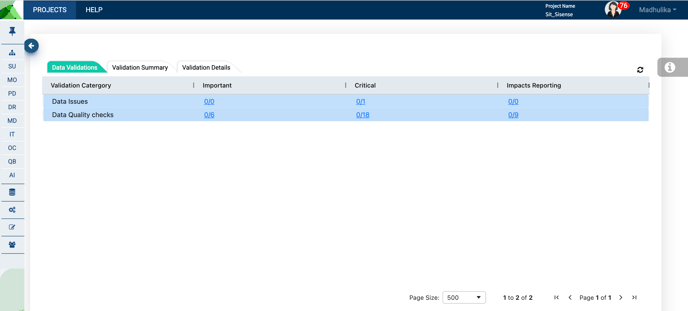
Data Quality Checks
Data quality checks are segregated into three categories:
- Important – These are the checks that failed on the important fields to run analytics.
- Critical – When a quality check is critical, the file is shown as Failed.
- Impacts Reporting – These are the checks that failed on the fields used for reviewing results.
The hyperlinks on the data quality screen leads to the screen which shows all the records failed under the three main categories are listed.
Data Validation
Validation Summary

Validation Details

At each stage of the Data Quality check, you will be able to view the validation details by selecting on the hyperlinked options on your work area.
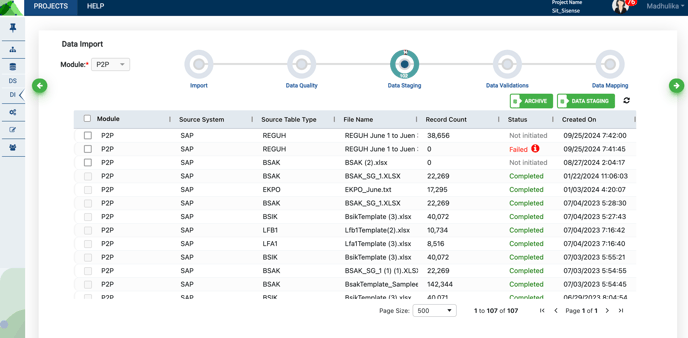
Data Staging
This section eliminates duplicate records, combines all the data of multiple files from the same template and dumps it into a single database table.
The files that had cleared the data quality stage are marked as Not Initiated here and ready for staging. You could pick these by ticking the check box and initiate the staging status using the Data Staging button.
Like the previous screens, the files go through different status, In Queue, In Progress, failed or completed. The information icon appears for failed files, you can click on it to know the reason for failure.
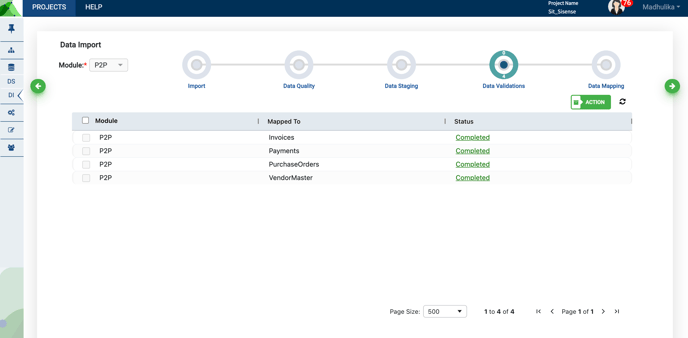
Data Validation
Unlike data quality checks, data validations are performed on the whole submodule entity, e.g., data validations on Invoices could compile a list of records with incorrect vendor information or if a certain invoice file has a record with no subsequent payments’ information.
All the files are in Not Initiated status when they first appear on this page. You may use the check boxes to select one record at a time and then click on the Data Validation button to initiate the process.
At the Data Validation level, files can only be downloaded at the phase level.
- Click the green “Action” button and select “Export” to the trigger the file download.
- In the Phase Level User Download screen, a record with a hyperlink is added.
- Users can also download the file from the User Download option.
Data Mapping
Data files that you have uploaded so far could belong to various source systems like CRM, BI tools, or other sources. Consider ERP as an example here. Some of the ERP source systems are SAP, Oracle, and PeopleSoft, yet the underlying data belongs to the same set of modules. Regardless of which source system-related data is used, the files are clubbed together to form unified data.
The konaAI application is built on a unified data management framework, identifying integrations between data sources and storing the unified data in a common data warehouse. This enables you to run analysis and take decisions while being cognizant of every data point.
All the files are in Not Initiated status when they first appear on this page, and in subsequent turns, in Pending status. You may use the checkboxes to select one record at a time and then click on the Data Mapping button to initiate the mapping process.
